
By John Fix · Updated June 17, 2026
One head in your sprinkler zone is sitting flush, leaking a sad little dribble into the grass while every other head pops up and runs fine. Before you call an irrigation company and hand over $75–150 for a service visit, know this: in the majority of cases, a single head refusing to pop up comes down to a clogged filter screen, a stuck riser, or a cracked body — all fixable in under 20 minutes with tools you already own and parts that cost less than a fast-food lunch. The job looks intimidating until you’ve done it once.
Got called out to a yard last week where the homeowner was sure the whole valve manifold was shot — the zone was running but one rotor just sat there weeping. Turned out a clump of packed grass had completely blocked the filter screen at the base of the nozzle. Pulled it, rinsed it under the hose, reinstalled it, and the head popped right up at full height. Here’s how to diagnose what you’re actually dealing with before you spend a dime.
What Actually Stops a Sprinkler Head From Popping Up
1. Clogged nozzle or filter screen. This is the number-one culprit. Every pop-up spray head has a small mesh filter screen inside the nozzle housing that catches grit before it jams the nozzle orifice. Grass clippings, sand, and mineral deposits pack that screen over time. When it’s blocked, water can’t push through with enough force to drive the riser up and produce a real spray pattern.
2. Stuck riser — debris or a dried-out wiper seal. The riser (the pop-up stem) rides inside the body on a rubber wiper seal that keeps water from leaking around the stem. That seal dries out and swells, or debris gets into the body cavity, causing the stem to bind. It feels fine when you push it down by hand, but water pressure alone can’t drive it up.
3. Low zone pressure. Too many heads on one zone, a partially closed zone valve, or a small supply leak can drop pressure below the 25–30 PSI most spray heads need and the 35–45 PSI rotors require. When pressure is marginal, the weakest head — the one farthest from the valve, or on a slightly lower lateral — is the one that won’t fully extend.
4. Cracked or broken head canister. Lawn mower wheels, foot traffic, and vehicle tires crack head bodies constantly. A cracked canister leaks water out around the stem rather than pushing the riser up. Sometimes the break is obvious; sometimes you only see it when the zone is running and water is sheeting out of the ground around the head.
5. Zone valve or solenoid not fully opening. The valve controls water flow to the entire zone. If the solenoid is failing, the diaphragm is torn, or the valve seat has debris holding it partially closed, you get reduced flow to every head — but usually one or two marginal heads show the problem first by failing to rise fully.
Tools & Parts You’ll Need
Tools:
- Small flathead screwdriver (for nozzle removal and pulling the filter screen)
- Channel-lock pliers or an irrigation head wrench (for unscrewing the body)
- Garden gloves
- A bucket (to flush the head before reinstalling the nozzle)
- Old toothbrush (for scrubbing the filter screen)
- Optional: nozzle filter pull tool (Rain Bird sells one for about $2)
Parts (buy only what your diagnosis points to):
- Replacement nozzle + filter screen set — about $2–4 at Home Depot or Lowe’s (fits most Rain Bird 1800-series and Hunter Pro-Spray bodies)
- Rain Bird 1804 4-inch pop-up spray body — about $4–7; the 1806 (6-inch) is about $5–8
- Hunter PROS-04 Pro-Spray spray body — about $5–8
- Hunter PGP-ADJ rotor head — about $13–18 at Home Depot or an irrigation supply house
- Wiper seal / cap seal kit for your head model — about $3–5 if the seal is the culprit rather than the full body

See also: Why your lawn mower dies after it warms up · Why your gas grill won’t get hot enough · Why your faucet keeps dripping
Step-by-Step: Getting That Head Popping Again
- Turn the zone off at the controller. Before you touch anything, go to your irrigation controller and disable the zone. You don’t want it firing while your hands are in the ground — a blast of pressurized water plus grit is a fast way to ruin your day and your eyes.
- Identify your head type. Spray heads (Rain Bird 1800-series, Hunter PROS-04) have a fixed nozzle and a fixed arc. Rotor heads (Hunter PGP-ADJ, Rain Bird 5000) have a moving nozzle turret that rotates back and forth. The cleaning steps are nearly the same, but rotors have more internal parts.
- Dig out around the head if needed. Clear a few inches of soil or turf so you can get a good grip. Be careful — buried lateral lines and low-voltage valve wires run in the same trench. Dig by hand or with a small trowel. If you need to dig more than 6 inches for any reason, call 811 first.
- Unscrew the head body from the lateral pipe. Grip the body with channel-lock pliers or a head wrench and turn counterclockwise. If the pipe spins with it, hold the pipe steady with your other hand. Water will seep from the pipe — that’s normal.
- Inspect the body for cracks. Look at the canister all the way around. Hairline cracks from mower damage are often only visible under running water, but deep cracks are obvious. If it’s cracked, the body is done — skip to step 8 and buy a matching replacement.
- Pull and inspect the riser/stem assembly. On spray heads, pull the riser straight up and out (it compresses a small return spring). Check for grit and the condition of the wiper seal at the base of the stem. A healthy seal is pliable; a failed one is brittle, cracked, or swollen.
- Remove the nozzle and pull the filter screen, then clean everything. Twist off the nozzle and pop out the small mesh filter screen below it. Hold both up to the light — the orifice and mesh should be clear. Rinse, scrub with the toothbrush, and soak in white vinegar for 10 minutes if mineral deposits won’t budge. Replace a torn screen ($2–3).
- Install or swap the head. If the body was cracked or the seal is shot, thread the new matching body onto the lateral by hand first, then snug it with pliers — tight enough to stop leaks but not so hard you crack the new body. Reinstall the riser, filter screen, and nozzle.
- Flush before buttoning up. Set the head in its hole but don’t backfill yet. With the nozzle removed, run the zone for 5–10 seconds to flush pipe grit out of the lateral before it packs your clean filter right back up. Then shut the zone off and reinstall the nozzle.
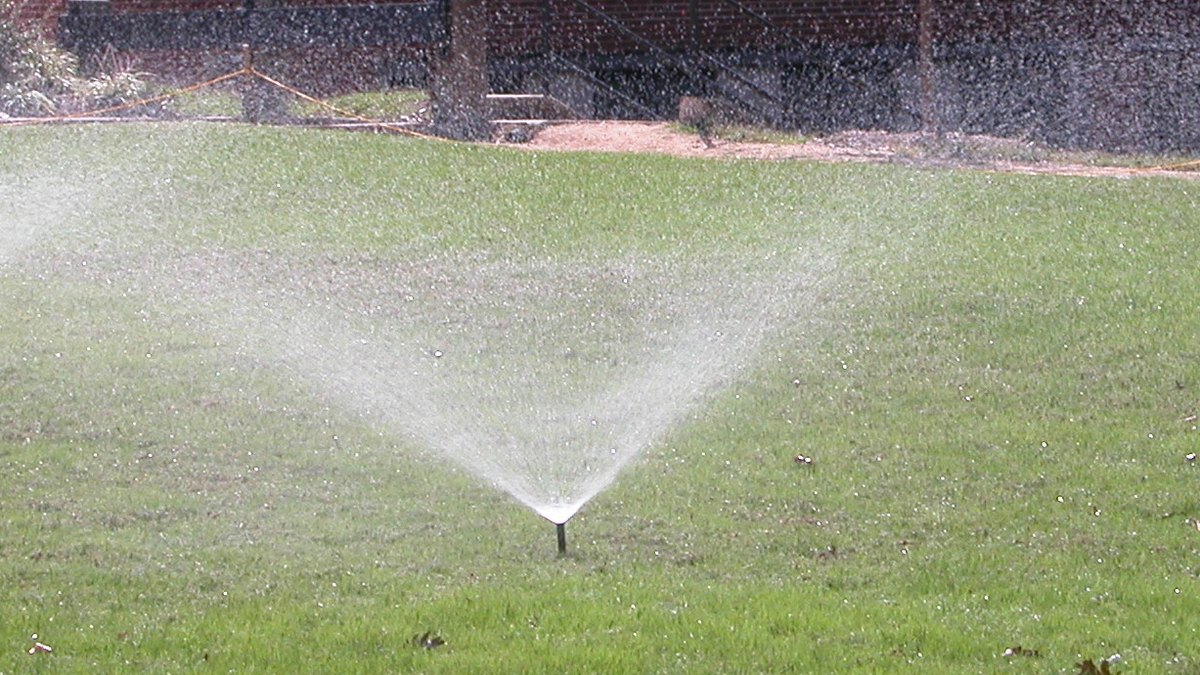
- Re-test the zone and adjust arc/radius. Turn the zone on and watch the head rise to full extension and spray cleanly. Spray heads have a center adjustment screw — clockwise to reduce radius, counterclockwise to increase it. Adjust rotor arcs per the manufacturer. Never put your face directly over the head during a live test.
What to Check If It Still Won’t Pop Up
If cleaning and replacing the head didn’t fix it, dig one level deeper:
- Zone valve not fully opening. At the valve box (usually a green plastic box in the yard), check that the manual bleed screw is fully closed, the solenoid wires are seated, and there’s no debris around the diaphragm cap. A torn diaphragm bleeds pressure rather than holding it — you’ll often hear a hiss at the box during the run.
- Pressure loss from a lateral leak. A wet, spongy low spot that never dries between runs usually means a cracked lateral pipe leaking before it reaches the head. You’ll need to locate and excavate that section.
- Too many heads on one zone. Residential spray heads need roughly 1.5–2 GPM each at 30 PSI. If heads were added over the years without recalculating flow, the zone is over capacity — you’ll need a pressure increase or to split the zone.
- Collapsed or crushed lateral pipe. Poly or PVC that’s been driven over can collapse internally and restrict flow with no visible surface damage. Section the lateral and inspect.
- Backflow preventer partially closed. If several zones underperform — not just one head — check that both backflow shutoff handles are parallel to the pipe for full flow.
When to Call a Pro
Do the free diagnosis and the $3–12 cleaning or replacement first — always. But hand it off to a licensed irrigation contractor or plumber when:
- You’ve traced the problem to a mainline or supply-side leak (anything before the backflow preventer)
- The zone valve solenoid needs electrical diagnosis or replacement and you’re not comfortable with basic low-voltage wiring
- Your backflow preventer needs testing, certification, or repair — in most areas this is a permitted procedure requiring a licensed backflow tester
- The system needs a pressure regulator installed or adjusted (it ties into the main water supply)
- It’s fall and you need a system blow-out/winterization with a compressor — over-pressuring PVC laterals is a real risk without the right equipment
- You have a pump-fed system and the pump itself isn’t delivering pressure
Frequently Asked Questions
Why does only one head fail to pop up while the rest work?
Usually that one head is under slightly higher restriction — a packed filter screen, a sticky wiper seal, or a cracked body — while the others run fine. It can also be the head farthest from the zone valve, where pressure is naturally lowest. Start with a cleaning before replacing anything.
Can I clean a sprinkler nozzle without replacing it?
Yes, in most cases. Remove the nozzle and filter screen, rinse under running water, scrub the mesh with an old toothbrush, and soak in white vinegar for 10 minutes if there are mineral deposits. Only replace it if the orifice is damaged or the mesh is torn — nozzles are just $2–4, so if cleaning doesn’t restore full spray after two tries, swap it.
Why do my sprinkler heads pop up but barely spray?
That’s a pressure problem more than a mechanical one. Either the radius-adjustment screw has been turned too far clockwise, the nozzle orifice is partially blocked, or zone pressure is low. Start by turning the adjustment screw fully counterclockwise; if that doesn’t help, check how many heads are on the zone and whether the valve is fully open.
How much should a sprinkler head replacement cost?
If you do it yourself, a spray head body runs $4–8 (Rain Bird 1804 or Hunter PROS-04) and a rotor runs $13–18 (Hunter PGP-ADJ) — about $10–20 in parts and 20 minutes of time. Hire an irrigation company and you’ll typically pay $75–150 for a service call plus $20–50 per head in labor.
Sources
- Rain Bird — 1800 Series Pop-Up Spray Heads (installation & specs)
- Hunter Industries — Pro-Spray (PROS) Spray Bodies
- U.S. EPA WaterSense — Watering Tips & Irrigation System Maintenance
- University of Florida IFAS Extension — Operation and Maintenance of a Residential Irrigation System
Our Point of View
About four out of five “dead head” calls come down to a clogged filter screen or a $7 head swap, not a failed valve or a pump problem. The valve and pump assumptions are expensive and usually wrong. Do the free cleaning first, the cheap part replacement second, and save the service-call budget for problems that genuinely need a licensed set of hands — backflow testing, mainline leaks, pump diagnosis. The $10 fix is almost always the right starting point, and working the checklist yourself means you’ll know your system better than any one-hour service visit will teach you.
Image credits: lawn pop-up sprinklers — “Lawn sprinklers at NCSSM” via Wikimedia Commons, CC BY-SA 3.0 (cropped); garden sprinkler in action — “City of London Cemetery Memorial Garden sprinkler” by Acabashi via Wikimedia Commons, CC BY-SA 4.0 (cropped).
FixItWhy Score: 8.7/10 — rated on diagnostic clarity, practical repair value, safety coverage, and source quality.
Editorial Review & Transparency
This article was reviewed by our editorial desk for accuracy. John Fix is verified at LinkedIn. Sources are linked inline and listed above. We update articles when new information becomes available. Last reviewed: June 17, 2026.

John Fix
John Fix is FixItWhy’s hands-on repair writer — a plain-spoken handyman who has spent years fixing the everyday stuff homeowners dread, from stuck sprinkler heads to stubborn faucets.
Disclaimer
The views, opinions, and analysis expressed in this article are solely those of the author and FixItWhy Media. They do not constitute professional advice — whether legal, financial, medical, or otherwise. You are free to agree or disagree with our perspective.
This content is provided for informational and editorial purposes only. We make no representations or warranties of any kind, express or implied, about the completeness, accuracy, reliability, or suitability of the information contained herein. Any action you take based on the information in this article is strictly at your own risk.
If the subject matter involves financial decisions, health concerns, legal matters, home safety, or any regulated activity, we strongly recommend consulting with a qualified licensed professional before taking action. FixItWhy Media and its authors accept no liability for any loss, damage, or injury arising from the use of this information.
© FixItWhy Media. All rights reserved.